Budget DIY Outdoor Kitchen Ideas and Setup: Build a Stylish Cooking Space for Less
Explore budget DIY outdoor kitchen ideas, from grill carts and cinder block counters to affordable storage, lighting, shade, layout tips, and safety essentials.
By Home Crane Editors. . 12 min read.
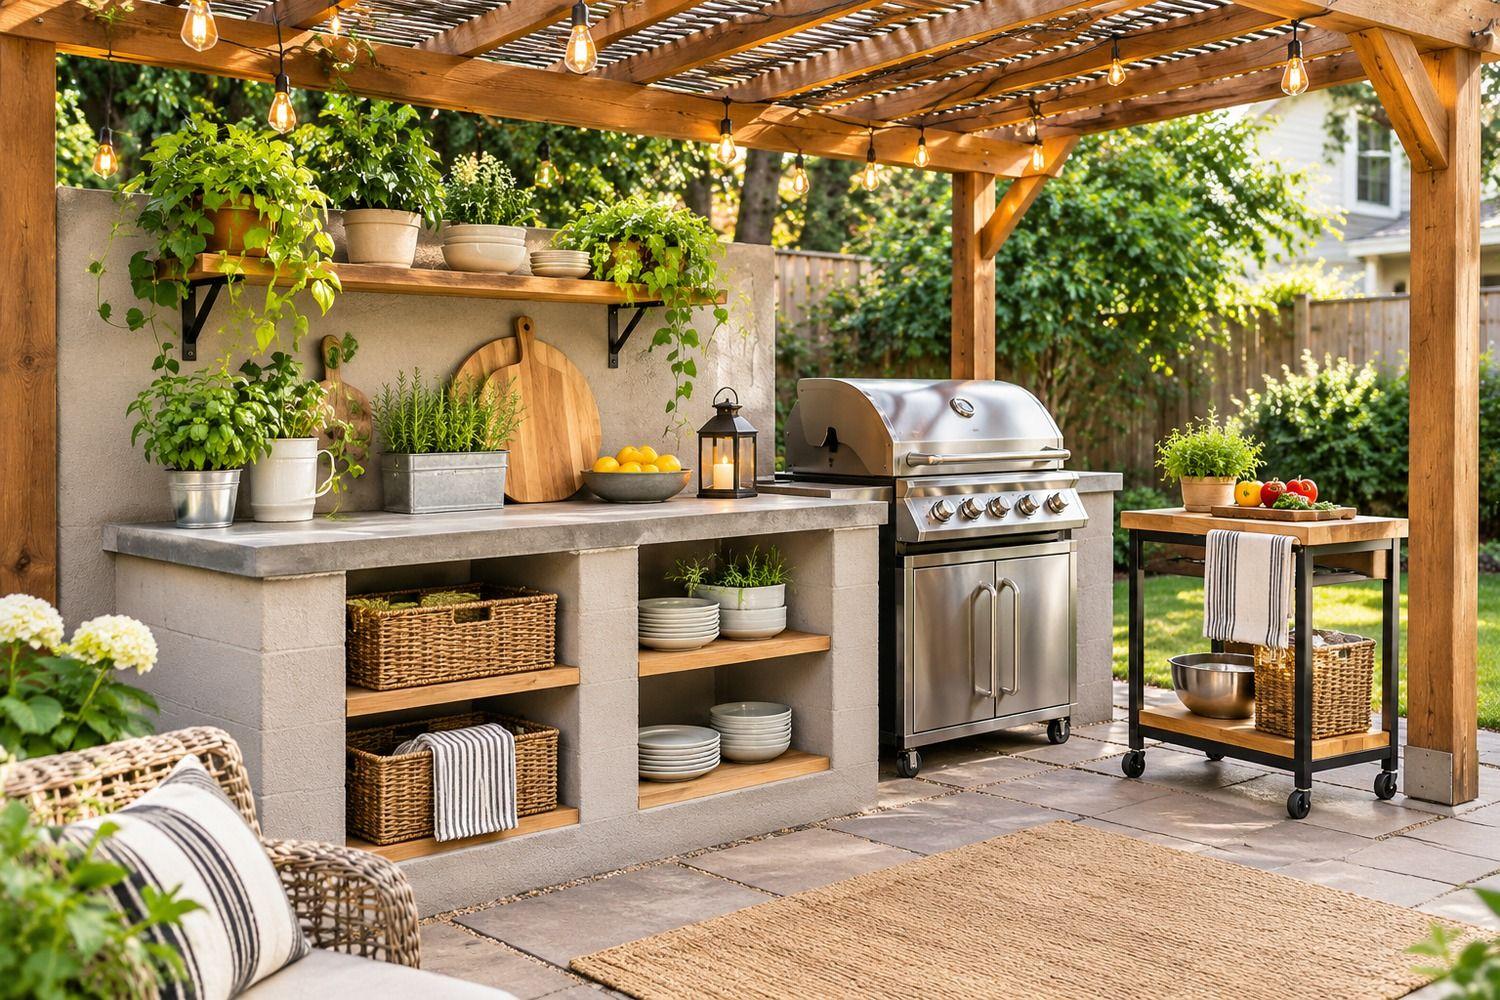
An outdoor kitchen can make a backyard more useful, but it does not have to begin with a built-in grill island, stone counters, plumbing, and a covered pavilion. A practical budget DIY outdoor kitchen can start with a grill you already own, a sturdy prep surface, weather-resistant storage, and a layout that keeps cooking and serving simple.
The best way to save money is to build in stages. Begin with the cooking essentials, use an existing patio or level hardscape where possible, and add permanent features only after you understand how you use the space. A rolling cart may be all you need for a small patio, while a larger backyard could accommodate a block base, concrete counter, and simple dining area.
This guide covers affordable outdoor kitchen ideas, material choices, layout options, a realistic planning checklist, and safety details to consider before you start.
1. Start With a Simple Outdoor Kitchen Plan
Before buying materials, decide what you actually want to do outside. A basic outdoor kitchen usually needs three functions: cooking, food preparation, and storage. Serving space is helpful, but a sink, refrigerator, bar, pizza oven, and roof are optional upgrades rather than essential starting points.
Measure the proposed area and note the location of doors, windows, fences, trees, overhead structures, and existing utilities. Choose a level, stable surface that can support the grill and work area. An existing concrete patio or properly installed paver area can save the cost and work of creating a new base.
Think about how people will move through the space. Keep the grill away from doors, low branches, combustible fences, and busy walkways. Leave enough room to open grill lids and cabinet doors, and keep a clear path between the kitchen and the house.
A straight-line layout is often the least expensive because it uses fewer corners and less countertop material. An L-shaped arrangement can create more prep space, but it needs a larger footprint and more careful planning. For a small yard, a portable grill with a separate prep cart may be more useful than a permanent island.
2. Build a Budget Grill Station Around the Grill You Own
The grill is usually the main purchase, so do not replace a working one simply to make the space look built-in. Start by giving your existing grill a stable, level position with the clearances required by its manufacturer.
Add a separate prep table beside it. Stainless steel is durable and easy to clean, while a properly finished outdoor-rated wood table can create a warmer, less industrial look. A rolling cart is especially useful if you need to move equipment into storage or make room for other backyard activities.
Keep the grill and food-preparation surface separate unless the grill manufacturer specifically allows the appliance to be installed in a built-in enclosure. Freestanding grills are designed to be used with their own legs, cart, ventilation, and tank arrangements. Do not enclose a portable grill inside a homemade cabinet.
3. Create a Cinder Block Outdoor Kitchen Base
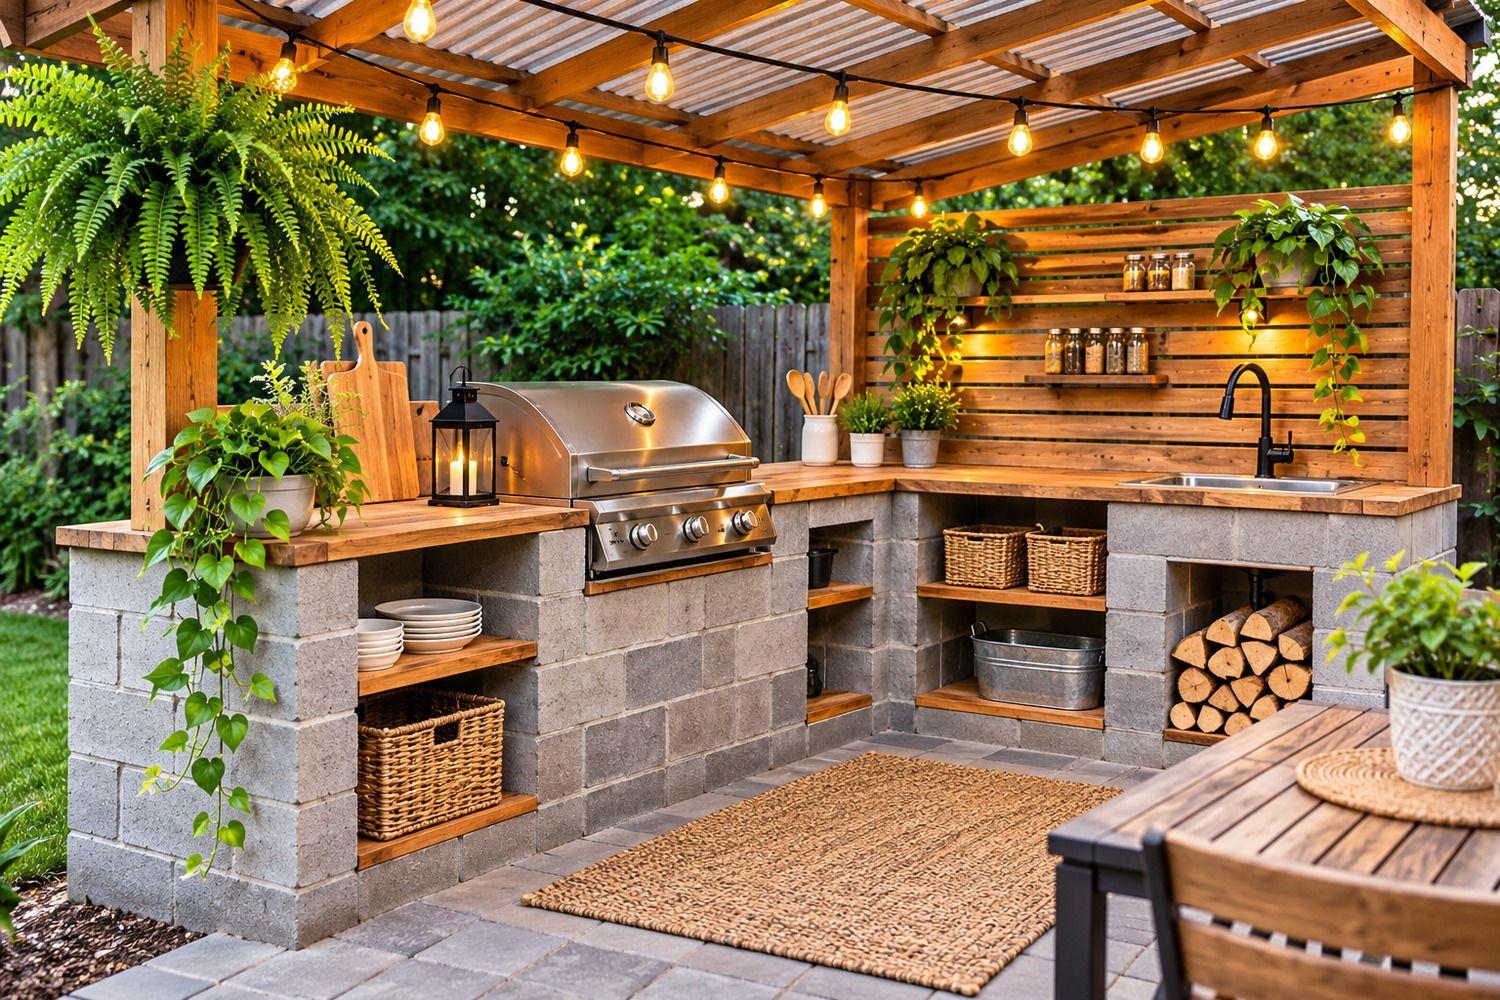
Concrete masonry units, commonly called cinder blocks, can form a durable base for a simple outdoor counter. They are relatively accessible, modular, and easy to arrange in straight or L-shaped configurations. A block base can be left with a clean utilitarian finish or dressed with an appropriate exterior finish.
Start with a stable, level, load-bearing base. Do not stack blocks on loose soil and assume the weight will keep everything in place. Depending on the size, height, soil, local climate, and whether the structure is attached or freestanding, the base may need compacted aggregate, a concrete footing or slab, reinforcement, and mortar. For a tall or permanent structure, ask a qualified mason or contractor to review the design.
Use block construction for the counter and storage sections, not as an improvised firebox around a grill. A built-in grill requires a purpose-designed enclosure and the clearances, ventilation, access panels, and noncombustible materials specified by its manufacturer. A freestanding grill can sit beside the block counter instead.
4. Make a Concrete Countertop
Concrete can be a budget-conscious countertop option when you have the tools and patience to build a proper form. It can be poured to fit a simple straight counter, finished in a natural gray tone, and sealed for easier cleaning.
A countertop project needs careful attention to thickness, reinforcement, support, curing, and sealing. Follow the concrete mix manufacturer’s instructions and use a sealer specifically intended for food-preparation surfaces and outdoor exposure. Concrete can crack or stain if it is poorly supported, improperly cured, or left unprotected from moisture and temperature changes.
If pouring a countertop is beyond your comfort level, look for a suitable remnant of natural stone or use an exterior-rated porcelain tile system over an approved substrate. The complete assembly matters: the substrate, adhesive, grout, edge treatment, and support must all be rated for exterior use.
Avoid indoor laminate, ordinary particleboard, and indoor-only engineered surfaces in exposed outdoor conditions. Sun, rain, standing water, and temperature swings can cause swelling, fading, delamination, or premature failure.
5. Use a Repurposed Prep Cart or Potting Bench
One of the easiest budget outdoor kitchen ideas is to repurpose a sturdy potting bench, worktable, or utility cart as a food-prep station. Choose a unit made from materials suitable for outdoor exposure, or protect it with an appropriate exterior finish.
Before using a secondhand table for food preparation, check that the surface is cleanable, stable, and free of peeling paint, chemical residues, splinters, and rust. A removable food-safe cutting board can provide a hygienic work surface. Keep gardening tools, fertilizers, pesticides, and potting soil away from food and cooking equipment.
A cart with wheels can be moved into a garage or shed when the weather changes. Locking casters help prevent movement while chopping or serving. Add a lower shelf for clean, dry accessories, but do not store propane cylinders in an enclosed cabinet unless the appliance and cabinet are specifically designed and approved for that purpose.
6. Add Open Shelves and Weather-Resistant Storage
Storage does not need to mean a full run of expensive outdoor cabinets. A few shelves can hold serving trays, grill tools, clean plates, and accessories. Use materials designed for outdoor conditions, such as stainless steel, powder-coated metal, masonry niches, or properly sealed exterior-grade lumber.
Keep items that need to stay sanitary in closed containers or bring them indoors after use. Open shelves are attractive, but dust, insects, pollen, and rain can settle on their contents. Woven baskets are best used for dry decorative storage in a sheltered location, not for items that need to remain hygienic.
A deck box or weather-resistant cabinet can hold cushions and non-food accessories. Store knives, matches, cleaning chemicals, and sharp tools securely and away from children. Never store propane cylinders inside a home, basement, or enclosed shed; follow the cylinder supplier’s storage instructions and local fire-safety guidance.
7. Choose Affordable Outdoor Countertop Materials
The countertop is one of the most visible parts of an outdoor kitchen, but it does not need to be premium stone. Compare the total installed system rather than the price of the surface alone.
- Concrete: Can be formed to a custom size and has a simple, modern appearance. It needs proper support, curing, and an outdoor-appropriate sealer.
- Porcelain tile: Exterior-rated porcelain can resist moisture and is available in many styles. Use an exterior-rated substrate, adhesive, grout, and edge details.
- Natural stone remnants: A local fabricator may have offcuts that suit a short counter. Confirm that the slab is suitable for outdoor use and can be supported safely.
- Stainless steel: Practical around food and easy to wipe clean. It can cost more than basic wood but offers a durable work surface.
- Exterior-rated wood: Warm and attractive, but it needs appropriate species, construction, drainage, and maintenance. Keep it away from grill heat and flame.
Avoid choosing a countertop solely because it looks good in an indoor kitchen. Outdoor surfaces must handle water, UV exposure, temperature changes, and regular cleaning.
8. Add a Small Outdoor Sink Only If It Makes Sense
A sink is convenient, but it can increase the project cost because it involves water supply, drainage, freeze protection in colder climates, and possibly permits. If the budget is tight, keep a washable basin or portable water container for simple tasks and carry dishes inside for proper washing.
If you want a permanent sink, have a qualified plumber plan the water supply and approved drainage. Do not drain greasy or soapy wastewater directly onto the lawn, into a storm drain, or toward a neighboring property. Local plumbing and environmental rules may apply.
A sink should be an intentional second-stage upgrade, not a feature added before the basic cooking and prep areas work well.
9. Create Shade With a Simple Pergola or Shade Sail
Shade can make an outdoor kitchen more comfortable, but overhead structures require careful planning. A freestanding pergola can define the cooking zone and support lighting, while a shade sail may offer a less expensive, more flexible option.
Do not position combustible fabric, wood beams, vines, or other flammable materials over or too close to a grill. Follow the grill manufacturer’s minimum overhead and side clearances. A pergola is not automatically a safe grill shelter, and a roof can trap heat and smoke if the design is unsuitable.
If you want a permanent roof, check local building requirements and have the structure properly anchored for wind and weather. A temporary shade sail should be installed according to its manufacturer’s instructions and taken down when conditions exceed its rating.
10. Use Lighting That Is Practical and Inexpensive
Lighting makes the kitchen easier to use after sunset. Battery-powered lanterns and rechargeable task lights are easy to add without installing wiring. For a more permanent arrangement, use outdoor-rated fixtures and have electrical work completed by a qualified electrician.
Place task lighting where food is prepared and served, but keep fixtures, cords, and switches away from heat, grease, and water. Use outdoor-rated products and suitable ground-fault circuit-interrupter protection where required. Do not use indoor extension cords or leave plug connections sitting on wet ground.
Warm string lights can add atmosphere around a dining area, but they should not hang over a grill or cooking flame. Keep decorative lighting separate from the hot zone.
11. Add a Compact Dining and Serving Area
A budget outdoor kitchen becomes more useful when there is somewhere to eat. You do not need a large dining set. A small bistro table, a narrow bench, or a couple of folding chairs can make the area feel complete.
For a small patio, choose furniture that folds or stacks. A narrow bar ledge can double as a serving surface, but make sure it does not block the cooking area or reduce the walkway. Use outdoor cushions that can be removed and stored when it rains.
Keep the dining zone far enough from the grill to avoid smoke, hot surfaces, and accidental contact. A separate serving table can also help guests stay clear of the person cooking.
12. Make the Kitchen Look Finished With Low-Cost Details
A few coordinated details can make a simple outdoor kitchen feel intentional without adding much cost. Use matching containers for utensils, a small herb planter, a tray for condiments, and a consistent palette of wood, black metal, and neutral textiles.
Choose accessories that can handle outdoor conditions. Herbs such as rosemary, thyme, and basil can be grown in pots near the prep zone, but keep plants away from grill heat and smoke. Use planters with drainage and saucers that do not leave standing water on the counter.
A simple backsplash can protect the wall behind a prep counter, but it should be made from an exterior-rated material and installed using a suitable system. Do not put combustible wood panels behind or beside a grill unless the manufacturer’s required clearances and a code-compliant design allow it.
13. Build in Stages to Keep the Budget Under Control
A staged project lets you spread the cost and avoid paying for features you may not use. A sensible order is:
- Stage one: cooking and prep. Use the grill you own, add a stable prep table, and organize the tools.
- Stage two: storage and surfaces. Add weather-resistant shelves, a durable countertop, and a secure place for accessories.
- Stage three: comfort. Add shade where safe, task lighting, and a small dining area.
- Stage four: utilities and upgrades. Consider a sink, refrigerator, built-in grill, or permanent roof only after checking costs, permits, and professional installation needs.
Current US cost guides show that professionally installed outdoor kitchens can cost many thousands of dollars, while small DIY additions to an existing patio can be substantially less. The final price depends on the grill, structure, countertop, utilities, local labor, and whether a new base or permits are required. Treat online budget examples as planning references rather than guaranteed quotes. HomeGuide’s outdoor kitchen cost guide lists DIY BBQ island kits and simple additions at lower price points than full custom builds, while Angi’s 2026 cost guide shows how utility connections, appliances, and labor increase the total.
14. Outdoor Kitchen Safety: Do Not Cut Corners
A budget build should never save money by compromising fire or electrical safety. Keep grills outdoors and away from the home, eaves, railings, overhanging branches, and combustible materials. Follow the appliance manual for exact clearances, ventilation, and installation requirements. Never use a grill in a garage, enclosed porch, or other enclosed space because of fire and carbon monoxide risks.
For propane appliances, use the cylinder and regulator specified by the manufacturer. Keep cylinders upright, outdoors, and away from heat and ignition sources. Do not store spare cylinders indoors or in enclosed spaces. Check hoses and connections as directed by the manufacturer, and stop using the appliance if you smell gas or suspect a leak.
For electrical equipment, use outdoor-rated fixtures and cords, protect connections from moisture, and use GFCI-protected outlets where required. Have a qualified electrician install permanent outlets or wiring. For gas lines, plumbing, structural work, and permits, consult licensed professionals and your local building department.
Budget DIY Outdoor Kitchen Setup Checklist
| Feature | Budget-friendly starting point | Upgrade later |
|---|---|---|
| Cooking | Existing freestanding grill | New grill or approved built-in unit |
| Prep surface | Outdoor-rated utility table or cart | Concrete, tile, or stone counter |
| Base | Existing level patio | Properly designed masonry base |
| Storage | Lidded bins or outdoor shelves | Weather-resistant cabinets |
| Water | Carry-in water and indoor cleanup | Professionally installed sink |
| Lighting | Rechargeable task light or lantern | Outdoor-rated fixed lighting |
| Shade | Existing safe covered area | Engineered pergola or roof |
| Dining | Folding table and chairs | Built-in bar or larger dining set |
Frequently Asked Questions
What is the cheapest way to build an outdoor kitchen?
The least expensive practical setup is often a grill you already own, a stable outdoor prep table, a small storage unit, and an existing patio. Add permanent masonry, countertops, and utilities only when you know they are necessary.
Are cinder blocks good for an outdoor kitchen?
They can be used to build a masonry base for counters and storage when the structure has an appropriate foundation and is built correctly. They should not be used to improvise a grill enclosure. Built-in appliances need a manufacturer-approved installation design and required clearances.
Can I use regular kitchen cabinets outdoors?
Most indoor cabinets are not designed for rain, humidity, UV exposure, or temperature changes. Use outdoor-rated cabinets or materials specifically designed and finished for exterior conditions.
What is the best low-cost outdoor countertop?
Concrete, exterior-rated porcelain tile, suitable stone remnants, and stainless steel are common options. The best choice depends on climate, support, installation skill, maintenance, and the complete exterior-rated assembly.
Does an outdoor kitchen need a permit?
It depends on local rules and the scope of the project. A portable grill and movable cart may not require the same approvals as a permanent masonry structure, new electrical circuit, gas line, plumbing, or roof. Check with your local building department before construction.
Can I put a grill under a pergola?
Only if the grill manufacturer’s clearance requirements and local fire/building rules allow that exact arrangement. Wood beams, fabric shade, and hanging decorations are combustible, so never assume a pergola is safe just because it is open-sided.
Final Thoughts
A budget DIY outdoor kitchen works best when it is designed around real cooking habits rather than a long list of expensive features. Start with a dependable grill, a clean prep surface, and practical storage. Use an existing patio, choose outdoor-rated materials, and build permanent features only when the layout and budget justify them.
A well-planned cart-and-grill station can be useful from day one. Over time, you can add a block counter, concrete or tile worktop, lighting, shade, and dining space. Keep fire, gas, electrical, and structural safety at the center of every decision, and your outdoor kitchen can become a hardworking extension of the home without turning into an oversized renovation.
Sources
- HomeGuide: How Much Does an Outdoor Kitchen Cost?. Checked November 7, 2026
- Angi: How Much Does It Cost to Build an Outdoor Kitchen?. Checked November 7, 2026
- This Old House: A Comprehensive Guide to Building an Outdoor Kitchen. Checked November 7, 2026
- U.S. Fire Administration: Grilling Safety. Checked November 7, 2026
- National Fire Protection Association: Grilling Safety. Checked November 7, 2026
- U.S. Consumer Product Safety Commission: Extension Cords. Checked November 7, 2026
Share this article
Get new guides by email
Practical home articles and free resources. No spam, and you can unsubscribe at any time.
Keep reading
DIY Backyard Movie Theater Setup for a Small Patio
Turn a small patio into a cozy backyard movie theater with a compact projector, portable screen, space-saving seating, smart lighting, and safe setup tips.
November 2026, 12 min read
How to Hang Backyard String Lights: A Modern, Step-by-Step Guide
Learn how to hang backyard string lights with modern layouts, secure anchors, support cables, outdoor-rated hardware, and practical safety tips.
November 2026, 9 min read
How to Build a Cheap DIY Outdoor Fire Pit Seating Area
Plan a budget seating area around a manufactured fire pit with suitable clearances, a stable surface, drainage, and practical maintenance.
October 2026, 3 min read