Easy DIY Over-the-Washer Storage Shelf for Tiny Laundry Rooms
Build a simple over-the-washer storage shelf with six illustrated steps, a sizing example, mounting guidance, and checks for lid clearance and safe storage.
By Home Crane Editors. . 7 min read.
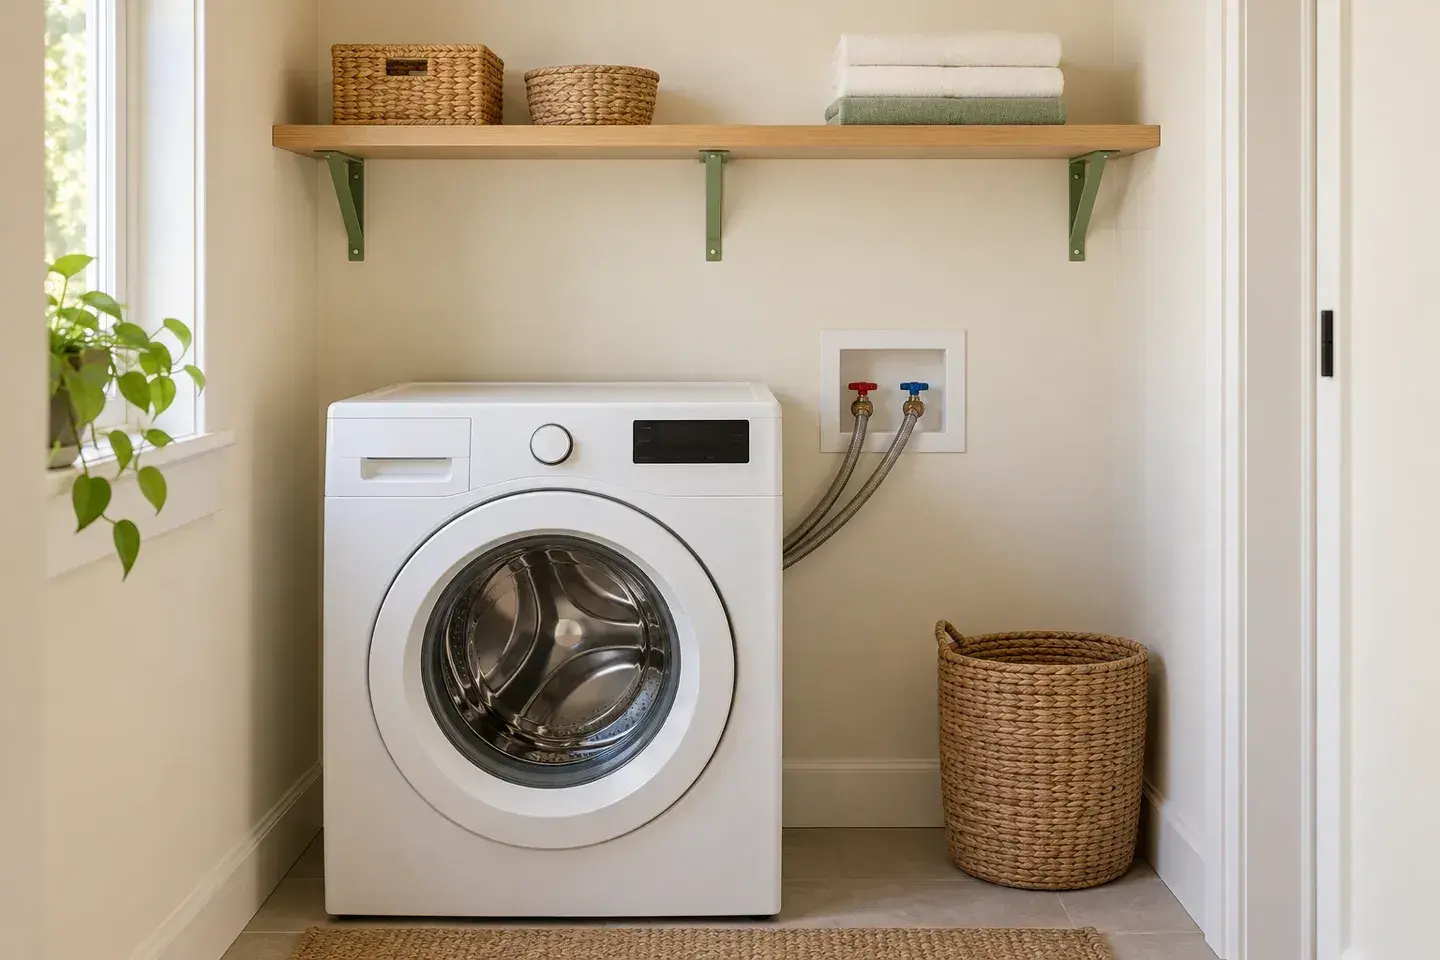
A single shallow shelf above the washer can give towels, mesh wash bags, and small laundry baskets a home without taking up floor space. For a beginner, a board supported by visible wall brackets is a straightforward design to plan because the attachment points remain accessible.
This tutorial covers one shelf mounted independently to the wall. It does not rest on the washer and is not a countertop, appliance support, or platform for climbing. The goal is useful light storage with room to operate and service the machine.
The dimensions below are a planning example, not a universal load-rated design. Select the shelf, brackets, spacing, and fasteners as a compatible system for your wall. A suitable prefabricated shelf-and-bracket kit can remove several material decisions while still letting you choose the location and finish.
Decide whether this design suits your laundry room
The clearest candidate is a front-loading washer with accessible wall space above it. A top-loading washer can also have an overhead shelf, but its open lid and your loading movement determine the position. A stacked laundry unit may leave no useful overhead space; side-wall storage can be more practical.
Keep shutoff valves, the drain connection, controls, outlets, and appliance removal access available. If the shelf would make a water leak harder to stop, move the shelf. Do not drill into the washer casing or attach storage to its controls.
Whirlpool's laundry-room planning guide highlights lid movement, hookups, and model-specific clearances. Use your exact appliance installation manual for the final requirements. A generic shelf-height recommendation cannot account for every lid, pedestal, control panel, and user.
Materials and tools
| Feature | What to confirm | |
|---|---|---|
| Shelf board or compatible shelf kit | Actual dimensions, condition, supported span, and intended use | |
| Wall brackets or a shelf system | Required shelf depth and thickness, bracket spacing, and attachment method | |
| Wall fasteners | Wall construction and the system's installation instructions | |
| Shelf-to-bracket screws | Correct thread and length without penetrating the shelf top | |
| Finish, if the board is unfinished | Suitable for the material and occasional cleaning | |
| Tape measure, level, pencil, and stud finder | Accurate layout before drilling | |
| Drill and specified bits | Matched to the chosen hardware and wall | |
| Saw, clamps, and sanding tools, if needed | Safe cutting setup away from the appliance |
A store-cut or ready-sized board can simplify the project. Check the cut quality and finished dimensions before leaving the store. You will also need suitable eye protection and any dust or hearing protection required by your tools and materials.
1. Measure the washer's operating space
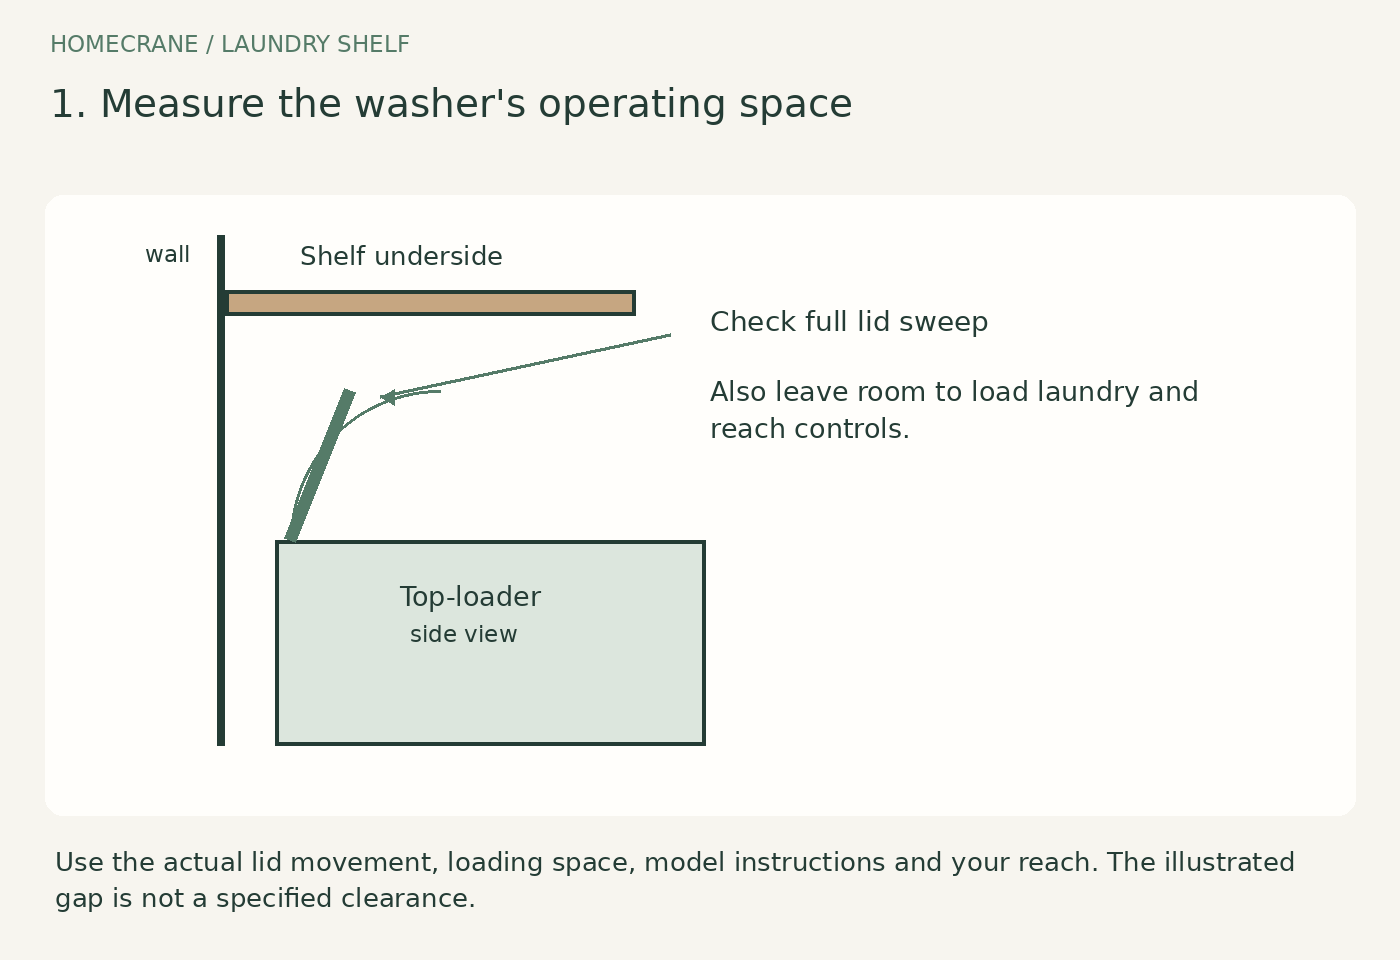
Open the lid or door fully and pull out any dispenser drawer. Measure the wall area only after checking those moving parts. For a top loader, consider the full lid sweep and the space needed to lift laundry out, not just the lid's highest point.
Mark a proposed shelf outline with painter's tape. Hold a lightweight cardboard depth template at that position to judge reach and projection. Keep yourself on the floor or a suitable stable step stool; never stand or kneel on the washer.
Record shelf width, depth, and underside height separately. Confirm that the shelf and brackets will not cover a shutoff box or prevent the appliance from being moved for maintenance. Measure with any existing pedestal included. If the result is too high to use comfortably, choose another wall instead of making the shelf deeper to compensate.
2. Find the wall structure and choose the hardware
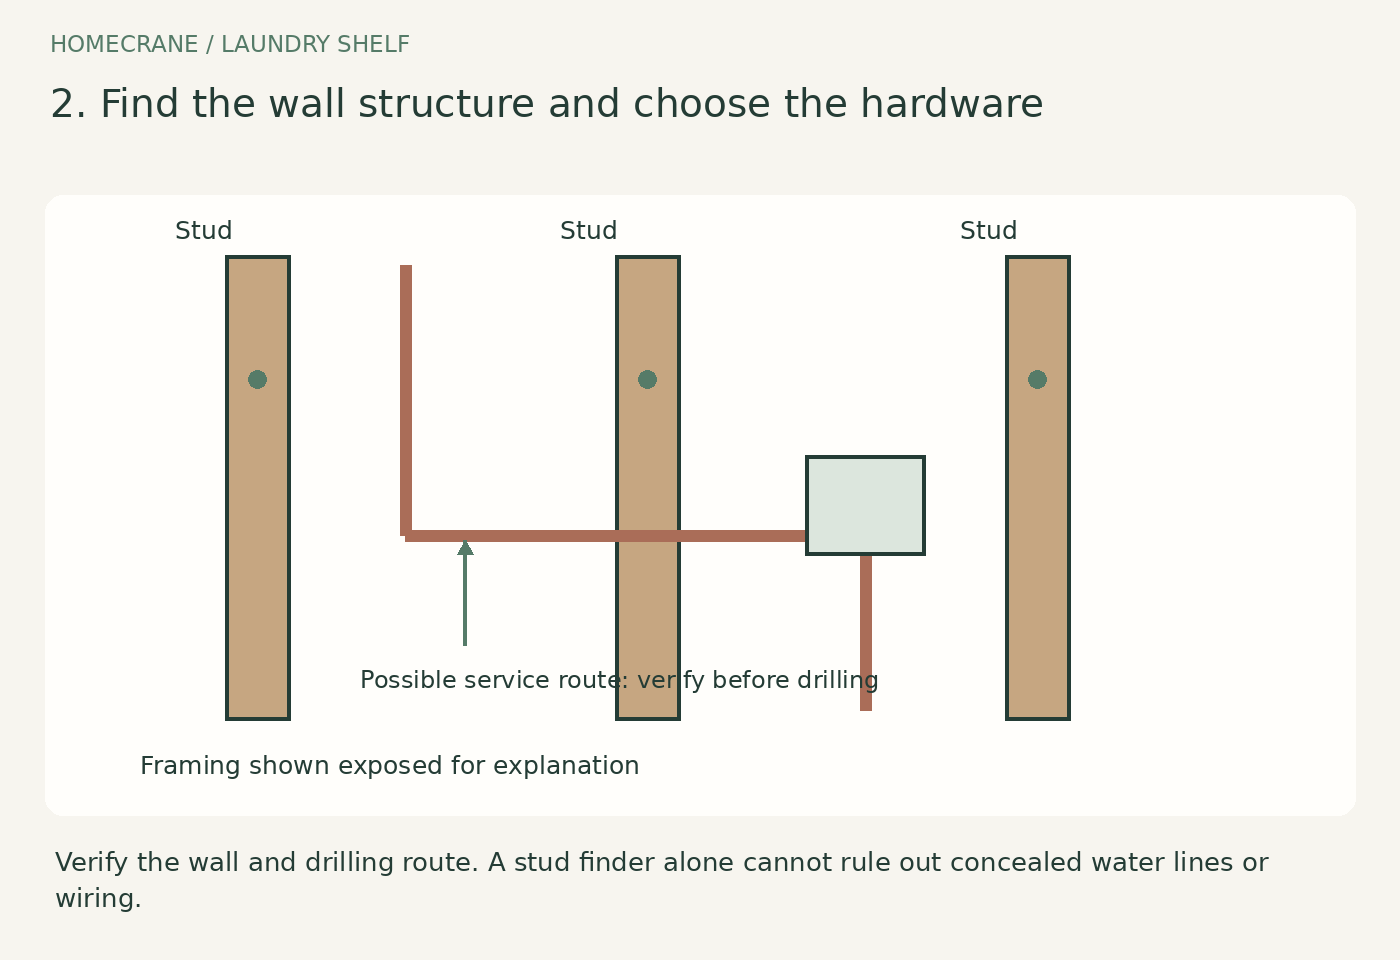
Identify the wall construction and suitable attachment positions. For this beginner design, attachment into verified wood studs is a useful starting point. A stud finder helps locate framing, but it does not prove the drilling path is free of pipes or wiring, especially behind a washer.
Check visible service locations, the wall on the other side, and any available construction information. If the route is uncertain, have someone qualified assess it before drilling. Masonry, metal studs, and hollow-wall mounting need their own suitable hardware and instructions.
Load ratings depend on installation conditions. For example, Knape & Vogt's adjustable-shelf kit instructions distinguish stud mounting in their load-rating information. That rating belongs to that kit and installation, not a homemade shelf with different parts. Do not multiply individual bracket ratings to invent a capacity for the finished assembly.
Choose the exact brackets before cutting the board. Confirm the required fasteners, number of supports, permissible spacing, and how the shelf is secured to them.
3. Make a cut plan and finish the board
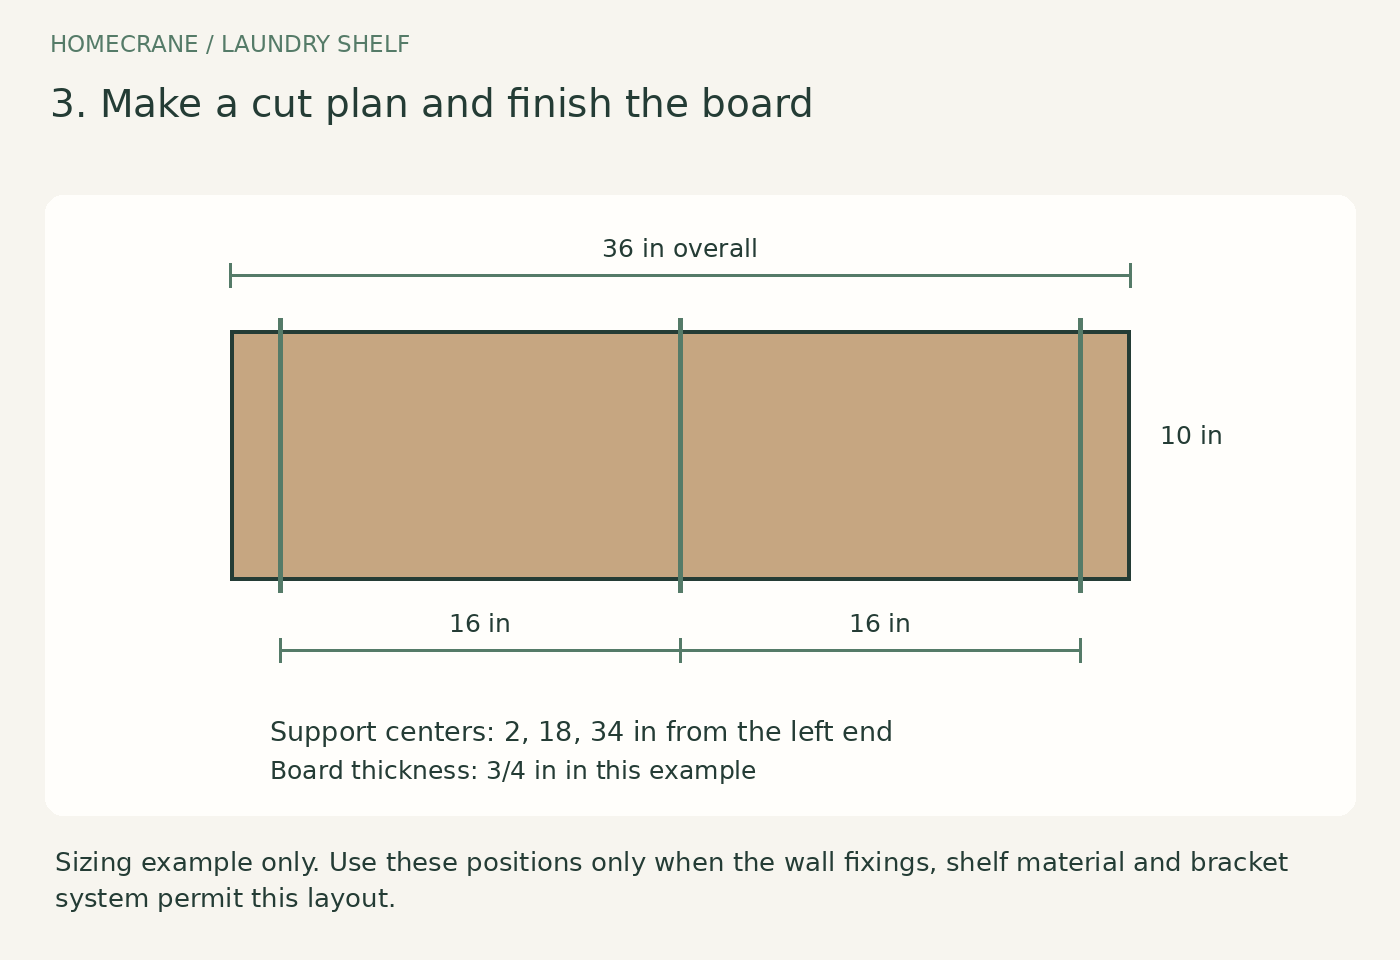
For illustration, a short shelf might be 36 inches long, 10 inches deep, and 3/4 inch thick, provided the selected material and bracket system permit those dimensions. This is a sizing example, not a recommendation for every washer or load.
| Feature | Planning measurement | |
|---|---|---|
| Finished board | 36 × 10 × 3/4 inches | |
| Three support centerlines | 2, 18, and 34 inches from one end | |
| Distance between supports | 16 inches | |
| End overhang | 2 inches at each end | |
| Shelf underside height | Determined by the actual washer, reach, and manual |
This layout only works if suitable fixing locations match those positions and the chosen system allows them. Adjust the shelf length or use an appropriate system when the actual wall differs. Do not move screws away from sound fixing points just to make the overhangs equal.
Cut and finish the board on a supported work surface away from the washer, hoses, and controls. Ease sharp edges and remove dust. Finish faces and cut edges as the material and coating require, then allow the specified cure. Unfinished edges near a laundry area are easy to overlook.
4. Mark and mount the brackets level
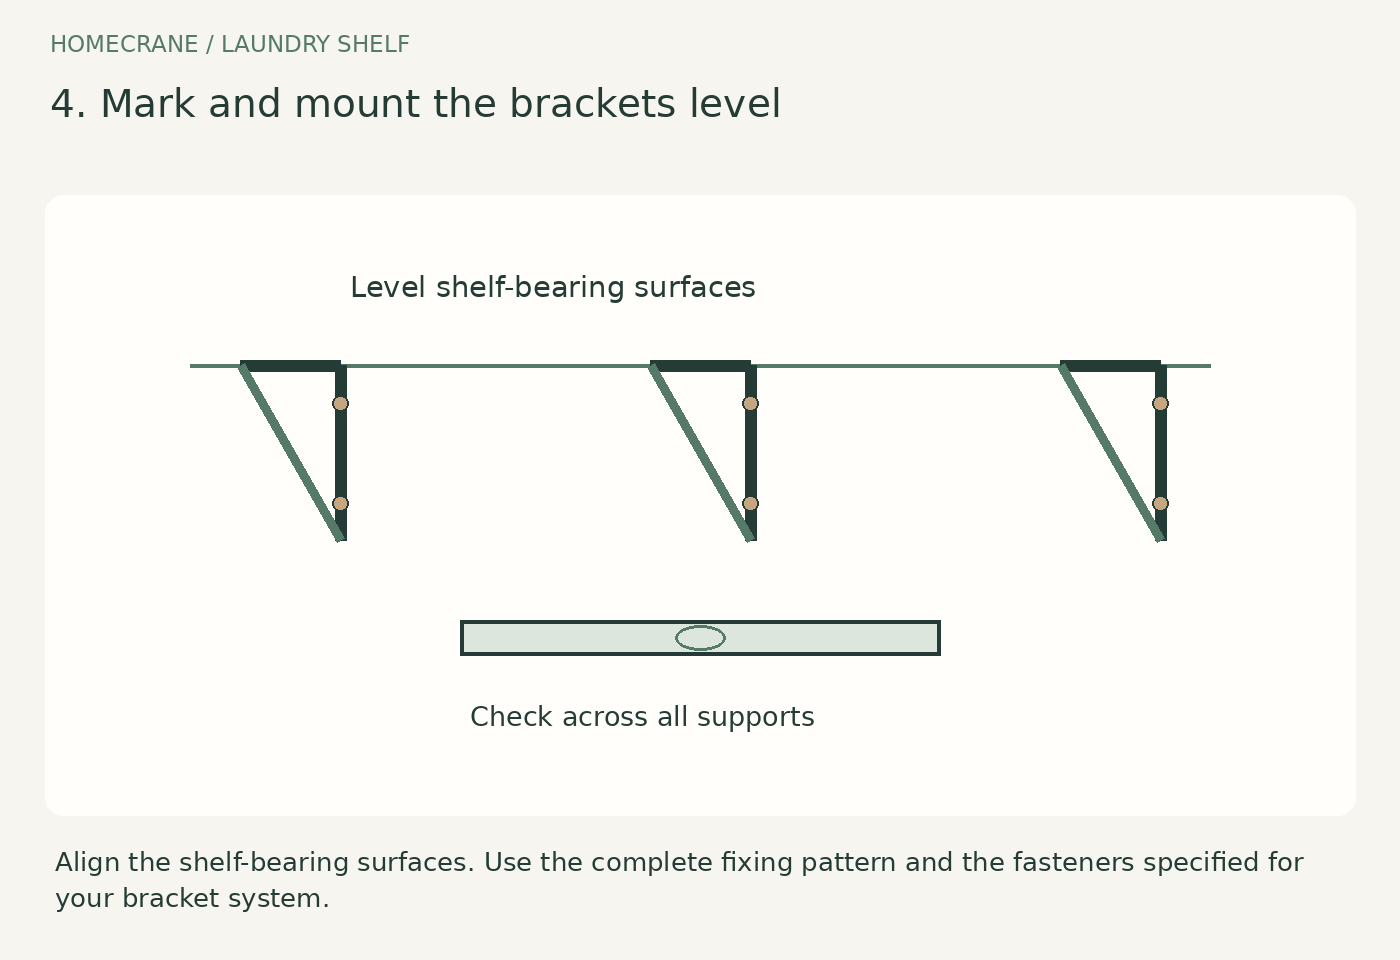
Transfer the confirmed support positions to the wall. Use the brackets as templates, making sure their shelf-bearing surfaces will line up on a level reference. The top screw hole is not necessarily the same height as the underside of the shelf.
Move or protect the appliance as needed to work safely. If moving it requires disconnecting water, power, or nearby dryer services, follow the appliance instructions or arrange help. Do not stretch hoses or use the appliance top as a workbench.
Drill the specified pilot holes only after resolving the concealed-service risk. Install the brackets with the approved fasteners, required embedment, and complete fixing pattern. Ordinary drywall screws are not a substitute for specified shelf hardware.
Check alignment across all supports before tightening and installing the board. If a bracket rocks, a screw spins, or the wall crumbles, stop and correct the attachment. A longer screw is not an automatic solution to an unknown wall problem.
5. Secure the shelf and check appliance access
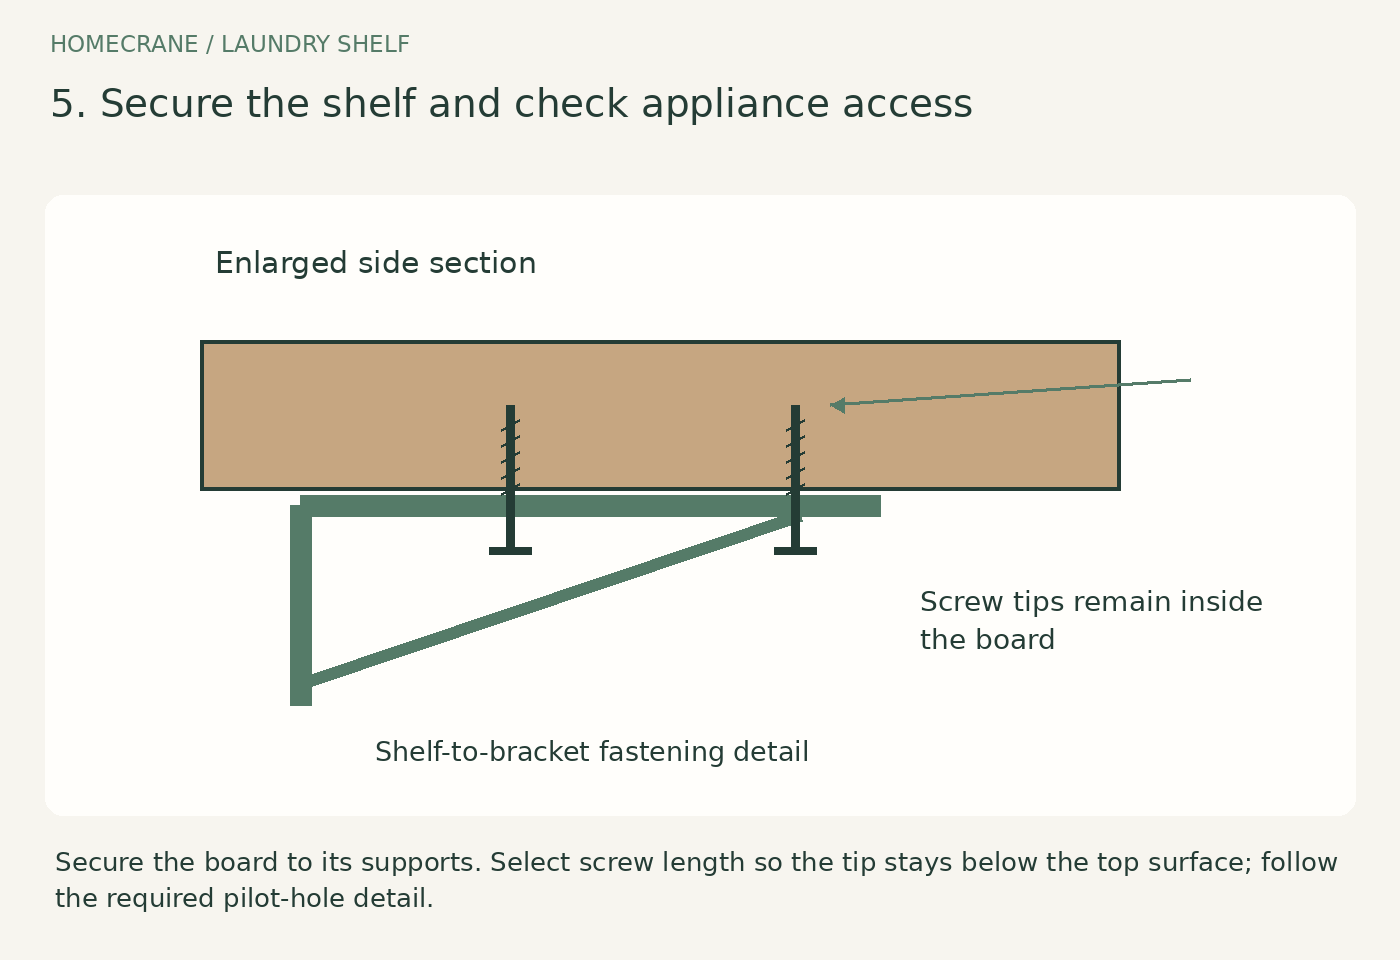
Set the board on the brackets and confirm the intended overhangs. Fasten it to the supports using the system's method. A board simply resting on brackets can slide when a basket is pulled forward.
Measure screw length against the bracket and board before driving it. The tip must not emerge through the top. Follow any pilot-hole requirement so the board does not split or the screw strip its hole.
Repeat the full operating check: open the washer lid or door, extend the dispenser, reach the controls, and reach the shutoff valves. Make sure the installation remains independent of the appliance and respects its required clearance. Check that future service access has not been boxed in.
If the board flexes noticeably, a bracket moves, or the fixings seem unreliable, leave the shelf unloaded and resolve the design or installation problem. Do not lean on it as a strength test.
6. Load lightly and organize by frequency of use
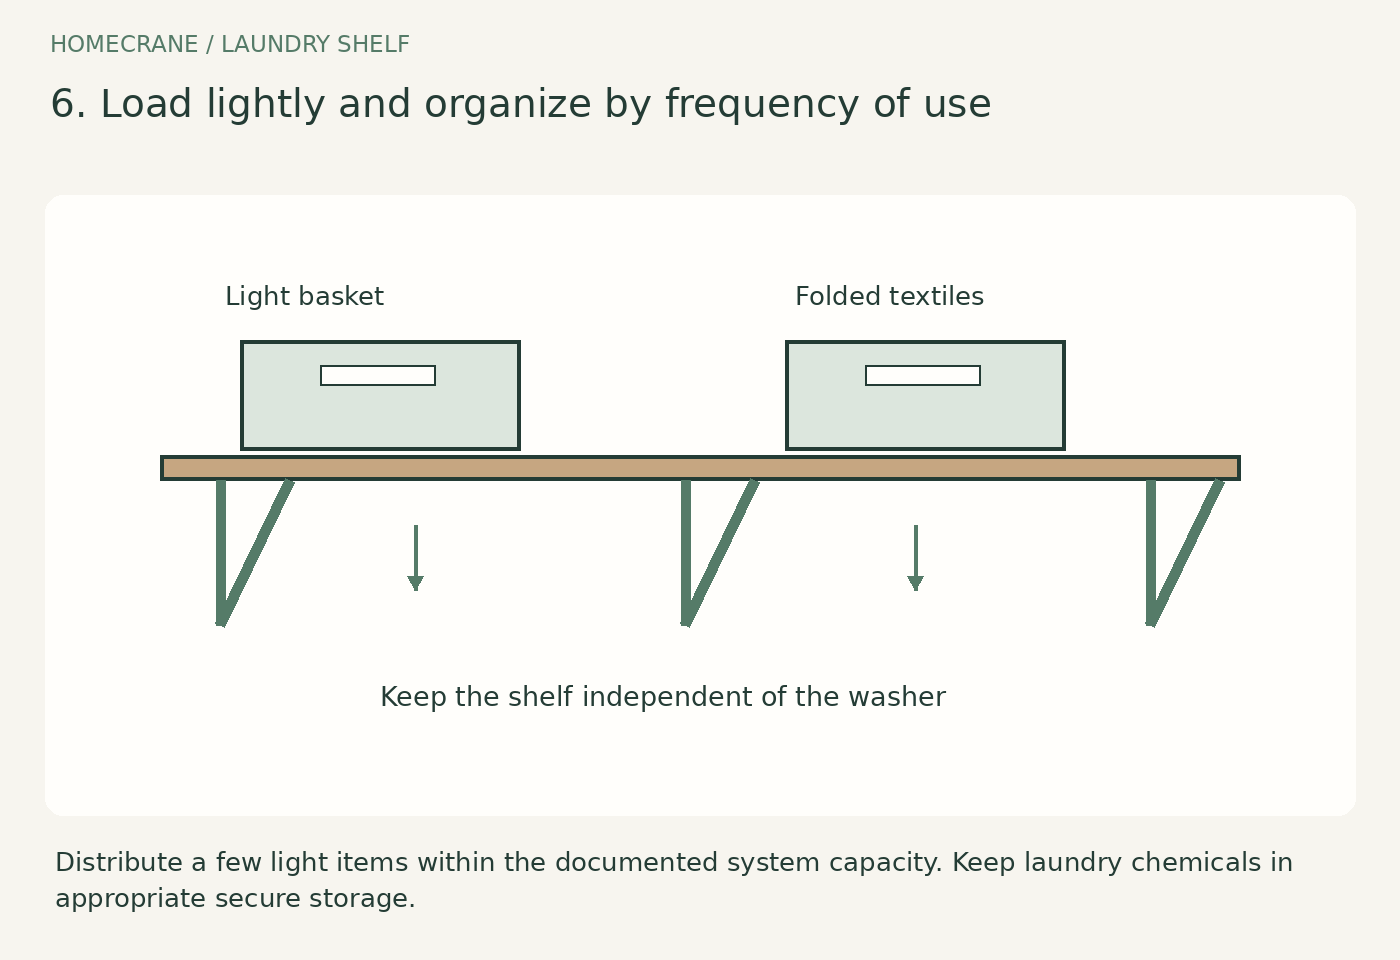
Start with a few lightweight items, distributed across the supported area and within the system's documented capacity. Include the board and containers when assessing the load where the system's rating requires it. Keep large detergent jugs and other heavy supplies in suitable lower storage.
Use a small basket for mesh bags or cleaning cloths, and leave open space so you can lift items without catching the shelf. Avoid tall glass jars above the machine. The purpose is convenient storage, not filling every inch.
Keep laundry products in their original labeled containers. The American Cleaning Institute's packet-safety guidance calls for secure storage out of children's reach and sight. An open shelf is not a child-resistant storage solution; use suitable locked storage when needed.
During the washer's first normal cycle after installation, check that the shelf does not contact the machine and stored items remain stable. Recheck attachments periodically. New movement, sagging, or cracks are reasons to unload it and investigate.
Budget for the whole shelf
A board price alone is not a project budget. Include the brackets, specified fasteners, finish, preparation supplies, tax, and any tools you do not own. Price the complete compatible kit against buying individual components before deciding which is cheaper.
One hypothetical $100 spending cap could allocate $25 to the board, $35 to brackets and required fasteners, $15 to finishing materials, and $25 to tax or contingency. These are spending targets, not researched retail quotes or a guarantee. They exclude new power tools and paid help. If the correct hardware costs more, simplify the shelf or postpone the project instead of substituting unsuitable fixings.
Problems to catch before they become repairs
| Feature | Better response | |
|---|---|---|
| Top-loader lid hits the shelf | Relocate or redesign the shelf after checking the full opening movement | |
| Shelf blocks water shutoffs | Move the storage so valves stay readily accessible | |
| Brackets do not match sound fixing points | Revise the layout or use an appropriate rated system | |
| Board begins to sag | Unload it and check material, span, supports, and load | |
| Supplies are difficult to reach | Use a lower side-wall location or smaller containers in safe storage | |
| Washer touches the shelf during operation | Stop using that arrangement and restore the required separation |
Questions beginners ask
How high should an over-the-washer shelf be?
There is no single correct height. Start with the appliance's instructions, full lid or door movement, service access, and your reach. The underside height is the important measurement when checking what fits below it.
Can I use adhesive brackets to avoid drilling?
This tutorial assumes mechanically fixed shelf supports. Adhesive hooks or strips should not be substituted unless the complete product is specifically designed and rated for this shelf, surface, environment, and load. Renters may prefer a suitable freestanding organizer that clears the appliance and follows its own anti-tip instructions.
Can the shelf sit directly on the washer?
No, not in this design. Wall brackets carry the shelf independently. A surface resting on the machine introduces movement and access problems and is a different project.
Is a floating shelf easier?
Not necessarily. Hidden supports can require accurate drilling and have specific restrictions on shelf construction and mounting. Visible brackets make it easier to see and inspect the supporting assembly.
Sources
- Whirlpool's laundry-room planning guide. Checked October 11, 2026
- Knape & Vogt's adjustable-shelf kit instructions. Checked October 11, 2026
- American Cleaning Institute's packet-safety guidance. Checked October 11, 2026
Share this article
Get new guides by email
Practical home articles and free resources. No spam, and you can unsubscribe at any time.
Keep reading

15 Icy Blue Bedroom Paint Ideas for 2026
Explore 15 icy blue bedroom paint ideas, from accent walls to blue ceilings, with warm pairings and practical sampling tips for 2026.
October 2026, 6 min read

Neo Deco Living Room Ideas: How to Get the Look on a Budget
Create a budget Neo Deco living room with curves, geometric patterns, metallic accents, jewel tones, and balanced furniture styling.
October 2026, 3 min read
15 Smart Small Laundry Room Stackable Washer Dryer Ideas
Explore 15 smart small laundry room stackable washer dryer ideas. Compare illustrated concepts, practical layout tips, and planning checks.
October 2026, 6 min read